| In 2.3 H-Sphere version and higher, mail autoresponder is a separate mail resource. The autoresponder sends a uniform response back to the sender whenever a message arrives in a mailbox. Here you can learn how to: Creating Autoresponders To add a new autoresponder, do the following: - On your control panel home page, click E-Mail.

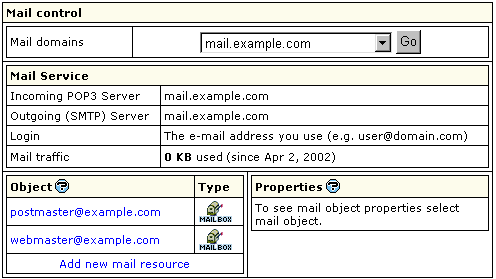
- At the bottom of the page that appears, click Add new mail resource:
- Choose Mail autoresponder from the drop-down list and click Next:

- Agree with the charges, if any.

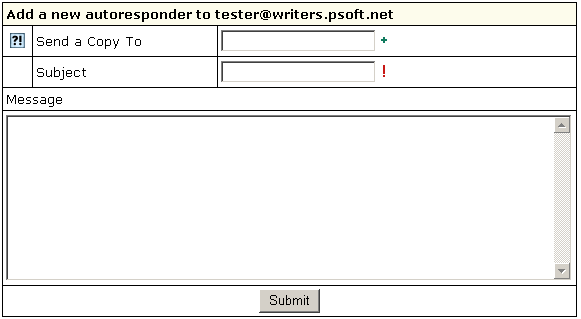
- Fill the form that shows:
- Send a Copy To: the optional e-mail address to which copies of response messages will be e-mailed.
- Subject: the subject of the response message, e.g. receipt confirmation.
- Message: the body of the response message, e.g. Your message was received. Thank you.
- Click Submit Query.
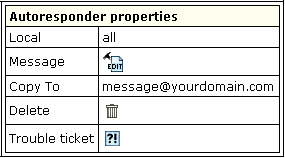
Combining forwards and autoresponders In version 2.3 and higher, if you want your mailbox to work as forward and mail autoresponder at the same time, you can give forward, mailbox and autoresponder the same name within one mail domain. In this case, your mailbox will forward all incoming email to another address and send responses to senders. Editing Response Messages. To configure your autoresponder, click its name in the list of mail resources. You will see the list of its properties on the right: 
- Local: local mail resource name without domain part.
- Message: a response to incoming mail;
- Copy To: email message where copies will be sent.
- Delete: click this icon to delete the mailbox.
- Trouble Ticket: report troubles with the autoresponder.
To edit the message text: - Click the name of the autoresponder.
- On the properties page, click the Edit icon next to the Message field.
- A message box appears. Here you can edit the text or enter a new one, change subject and Copy to email.
- Click Submit to confirm changes.
|